Fishing rods are essential tools for anglers, and maintaining them ensures optimal performance on the water. Over time, a fishing rod’s handle may wear out, become uncomfortable, or need replacement to suit personal preferences. Knowing how to remove a handle from a fishing rod without causing damage is a valuable skill for any angler. At Fishing Gear Shops, we understand the importance of proper rod maintenance to extend the life of your equipment. This guide provides a step-by-step process to safely remove a fishing rod handle, along with tips to avoid common mistakes.
Why Remove a Fishing Rod Handle?
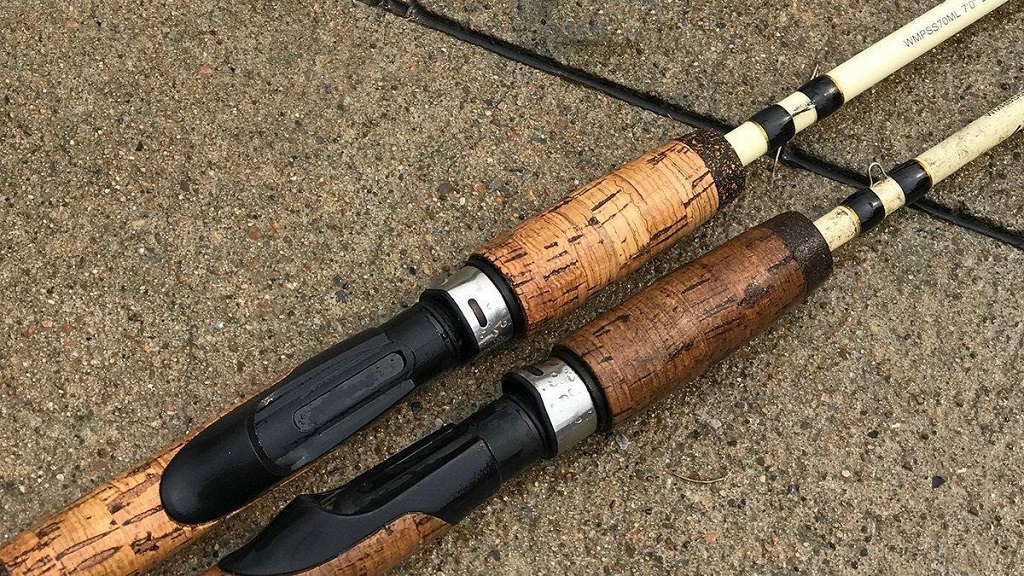
Fishing rod handles, often made of cork, foam, or composite materials, can degrade due to exposure to water, sun, or heavy use. Anglers may also want to customize their rods for better grip or aesthetics. Removing the handle allows you to replace it with a new one or repair the rod without compromising its structural integrity. However, improper techniques can damage the rod blank or other components, leading to costly repairs. Therefore, following a careful approach is essential.
Tools You’ll Need
Before starting, gather the necessary tools to ensure a smooth process. Having the right equipment minimizes the risk of damaging the rod. Here’s what you’ll need:
- Utility knife or razor blade
- Heat gun or hairdryer
- Sandpaper (medium grit)
- Masking tape
- Screwdriver (if the handle includes screws)
- Clean cloth
- Rubbing alcohol
- Protective gloves (optional for safety)
These tools are commonly available at hardware stores or online retailers like Fishing Gear Shops. Preparing your workspace with these items ensures efficiency and safety.
Step-by-Step Guide to Removing a Fishing Rod Handle
Follow these steps to remove the handle without harming the rod’s blank or other components. Each step is designed to be straightforward and safe.
Step 1: Prepare the Rod and Workspace
Start by cleaning the rod to remove dirt or grime. Use a clean cloth and rubbing alcohol to wipe down the handle area. This prevents debris from interfering with the removal process. Next, secure the rod in a vice or clamp, ensuring it’s stable but not overly tightened to avoid damaging the blank. Cover the rod blank with masking tape above and below the handle to protect it from scratches.
Step 2: Assess the Handle Type
Fishing rod handles are typically secured with adhesive, screws, or a combination of both. Inspect the handle to determine how it’s attached. For example, spinning rods often have cork or foam handles glued to the blank, while some casting rods may include screw-in components. Identifying the attachment method helps you choose the right removal technique. If screws are present, use a screwdriver to remove them carefully.
Step 3: Apply Heat to Loosen Adhesive
Most fishing rod handles are bonded with epoxy or similar adhesives. To loosen the glue, apply low heat using a heat gun or hairdryer. Hold the heat source about 6 inches from the handle and move it evenly to avoid overheating any single spot. Heat for 2-3 minutes until the adhesive softens. Be cautious not to apply excessive heat, as this can weaken the rod blank, especially if it’s made of graphite or fiberglass.
Step 4: Cut Away the Handle Material
Once the adhesive is softened, use a utility knife or razor blade to carefully cut away the handle material. Start at one end and make shallow cuts along the length of the handle, working in small sections. Avoid cutting into the rod blank, as this can compromise its strength. For cork handles, the material may crumble, so work slowly to maintain control. If the handle is made of foam, it may peel away in strips.
Step 5: Remove Residual Adhesive
After removing the bulk of the handle, you’ll likely find adhesive residue on the rod blank. Use medium-grit sandpaper to gently sand away the remaining glue. Sand lightly to avoid damaging the blank’s surface. Wipe the area with a cloth dampened with rubbing alcohol to clean off any dust or adhesive remnants. This step ensures a smooth surface for installing a new handle.
Step 6: Inspect the Rod Blank
Once the handle is removed, inspect the rod blank for any signs of damage, such as cracks or dents. If you notice any issues, consult a professional rod builder before proceeding with a new handle installation. A clean, undamaged blank is crucial for maintaining the rod’s performance.
Tips to Avoid Damaging the Rod
Removing a fishing rod handle requires patience and precision. Here are some tips to prevent damage:
- Work slowly to avoid applying excessive force.
- Use low heat settings to prevent weakening the rod blank.
- Keep the utility knife blade sharp to ensure clean cuts.
- Protect the blank with masking tape at all times.
- Test the adhesive’s softness periodically to avoid overheating.
Following these tips minimizes the risk of costly mistakes. For additional guidance on rod maintenance, reputable sources like Field & Stream offer valuable insights into fishing equipment care.
Common Mistakes to Avoid
Anglers often make errors when attempting to remove a fishing rod handle. Rushing the process can lead to nicks or scratches on the rod blank. Using too much heat can weaken the rod’s material, especially for graphite rods. Additionally, failing to clean the blank thoroughly can cause issues when installing a new handle. By following the steps above and taking your time, you can avoid these pitfalls.
Installing a New Handle
After successfully removing the old handle, you may want to install a new one. Choose a handle material that suits your fishing style, such as cork for comfort or EVA foam for durability. Apply a high-quality epoxy adhesive to secure the new handle, ensuring it’s aligned properly with the rod blank. For detailed instructions on handle replacement, resources like TackleTour provide expert advice on rod customization.
Read More Also: Cultivating Your Wanderlust with Thriving Raised Beds
Conclusion
Removing a fishing rod handle without damaging the rod is a straightforward process when done correctly. By preparing the right tools, applying heat carefully, and working slowly, you can safely remove the handle and prepare the rod for a new one. This skill not only extends the life of your fishing rod but also allows you to customize it for better performance. With patience and the right techniques, you’ll maintain your rod’s integrity and enjoy many successful fishing trips.
Read More Also: An introduction to FCA compliance
Frequently Asked Questions
-
Can I remove a fishing rod handle without a heat gun?
Yes, but it’s more challenging. You can use a hairdryer on a low setting or soak the handle in warm water to soften the adhesive, though this may take longer.
-
Will removing the handle void my rod’s warranty?
It depends on the manufacturer. Check the warranty terms before proceeding, as modifications may affect coverage.
-
How long does it take to remove a fishing rod handle?
The process typically takes 30-60 minutes, depending on the handle type and adhesive strength. Working slowly ensures better results.
-
What type of adhesive should I use for a new handle?
Two-part epoxy is commonly used for securing new handles. Ensure it’s compatible with your rod blank material.
-
Can I reuse the old handle after removing it?
In most cases, no. The removal process often damages the handle, making it unsuitable for reuse. Consider purchasing a new one for best results.